
I have now gotten my hands on a small sandblasting cabinet. This is for firing small dust particles, that are made from different materials, at rusty objects, meaning that you can clean them back to the naked metal. Being used, it’s dusty and has some parts that are loose. This means I needed to fix or adapt them to make it back to ‘optimal‘ working condition. Well, good enough for me, anyway. This is a Clarke cabinet and is very well made. The modern version of this is at around the £170 mark, and I paid £73 for this used on. It has been well used, but not over the top. There’s all the parts available, with extra viewing screens and different sized nozzles, Dave even threw in some blasting media, quite a bit, too! The current screen is a bit scratched up, but serviceable, but other jobs have included:
- Re-attach the filter to the side wall and allow the vacuum hose to be attached for dust extraction.
- Fit the air-hose so that the connector is attached to the outer wall for the hose to attach to, from the compressor.
- Repair the 12v light switch, on the cabinet’s left-hand side.
- Re-attach the gun’s spigot to the collector hose and clamp it.
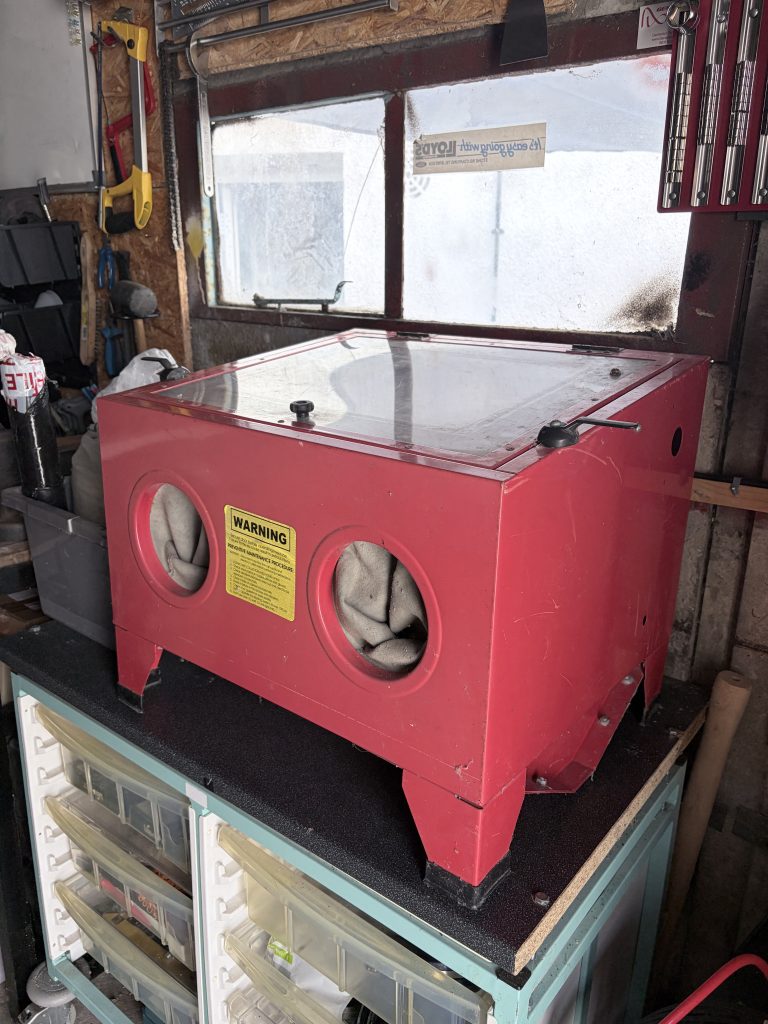
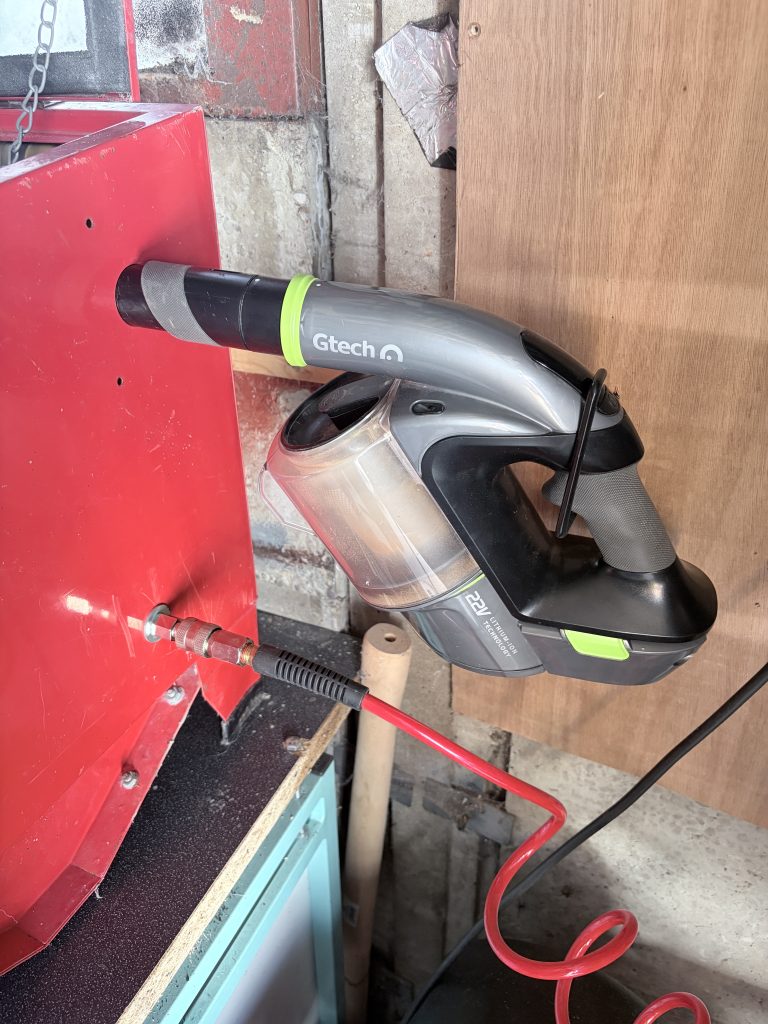
I started by adding the hose, using a jubilee clip to fasten it on and seal it up. This was simple, as you would expect. I then set my sights on how to add the suction and filter onto the wall. This needed up being okay, with small bolts to hold it on (this will be a pain when I want to clean or swap the filter) and the old G-Tech sucker pushing into the ready-made hole. I do believe that there is a piece missing here, so adaption was my best bet. I used a long hook to grip the G-Tech to the wall, so this turned out well. The connector was simple, too. I had an adaptor bit for changing the size over, and PTFE‘d the thread and fastened it through the walling. Next, came the switch!
THE SWITCH!
This was damaged to a point that it would not rock, at all. The clear-red was broken, and the waterproofing cover was dirty. I decided that a completely new switch was needed. As I don’t need the illumination aspect of it, I chose to go for the cheaper switch. Being for a light, why do I need another light to tell me it is on?
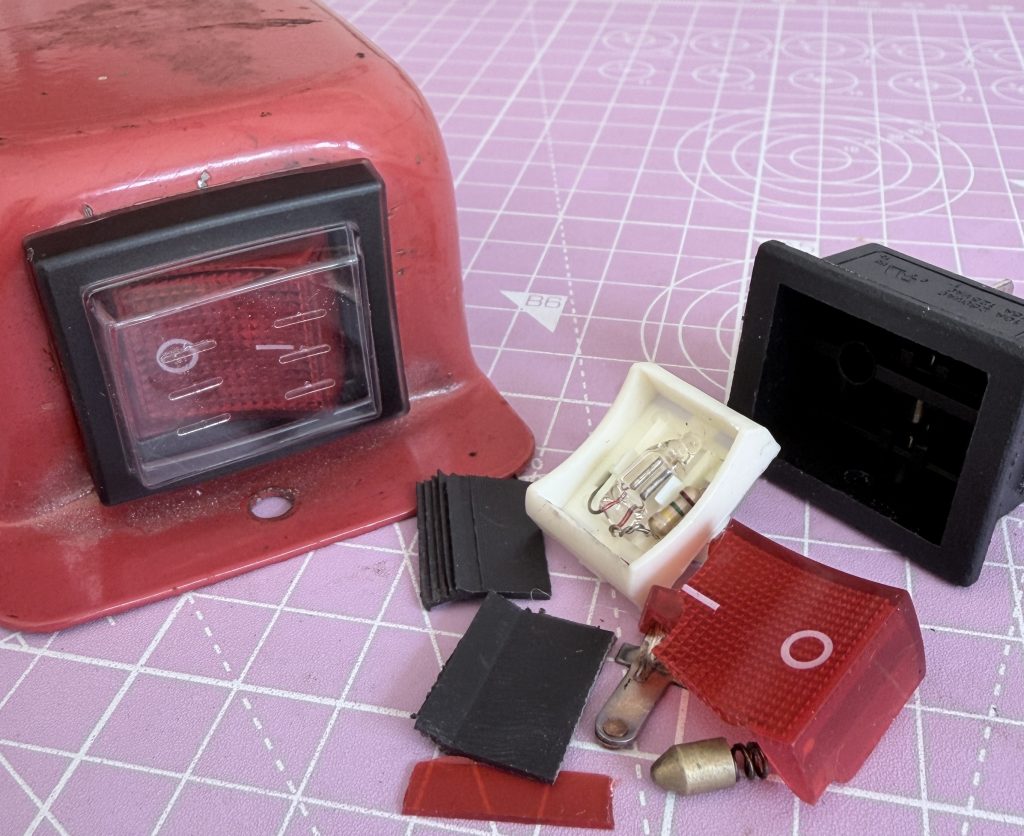
Taking the metal boxing off of the cabinet, I was able to see the wiring. With NO electricity on, I took a photo of the wiring setup before pulling the off the spades. It is only a two-pole, rocker-switch, so it isn’t complicated. I then had to prise the switch out, where it completely fell apart! It was time for the new on. I reversed the process, plugged it in, and…whoop whoop, it works.
Summary
This was a good buy and will be reviewed as I use it. The biggest cost with these is the need for a decent compressor. Once you go above the 4-6cfm (Cubic Feet per Minute) range, they become expensive. This requires at least 10cfm, so the 14cfm was the best option, for now. Now, it’s time to find things to blast!
Extra: Once I started to use it, I found that the nozzle, within the blast-gun, was worn down. I managed to find a new setup from an Ebay seller; I am now just waiting for it to arrive!