

So, I finally got started on refitting the Tack Room at the stables. This has been discussed for more than a year and I had yet to get the materials and begin. The first seven hours have seen me clear out and tidy up the alcove, fit the rear skin for the boot holes and create the sides. Let’s break it all down:
Tidy the Alcove
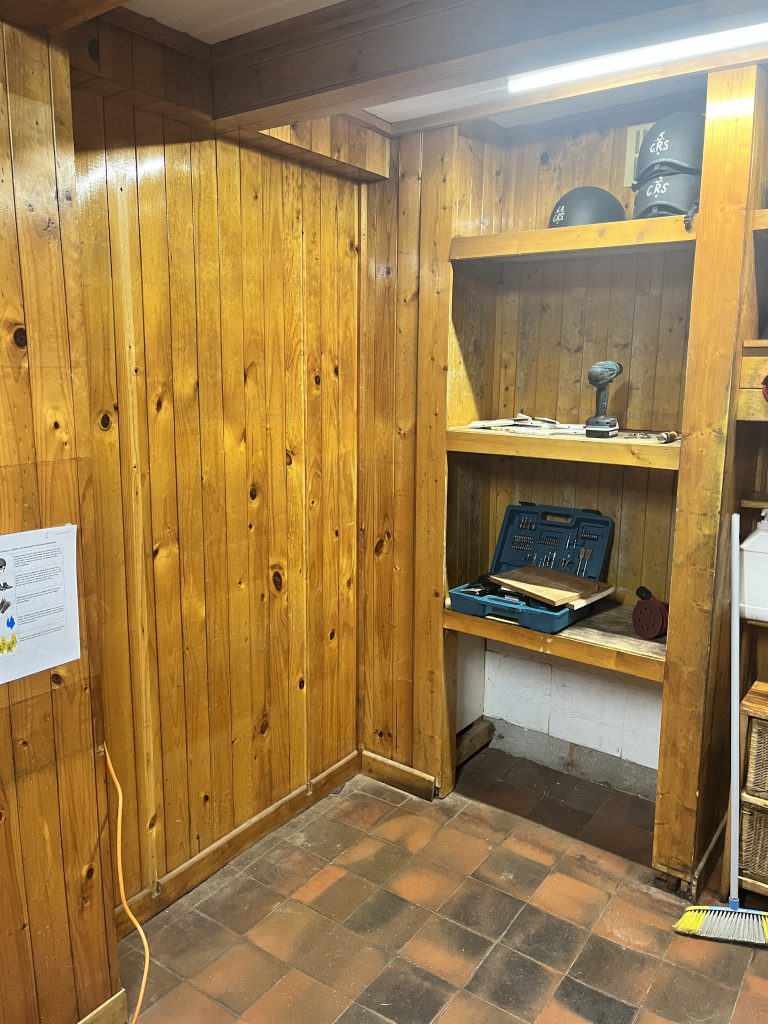
The space needed to be cleared of the current shelves, a somewhat industrial ideal with metal back rails and chunky shelf arms, then clean the walls and remove the skirting. This is a space that measures 2.2m X 1.3m X 0.25m (HxWxD) and looks spot on for the idea that I had.
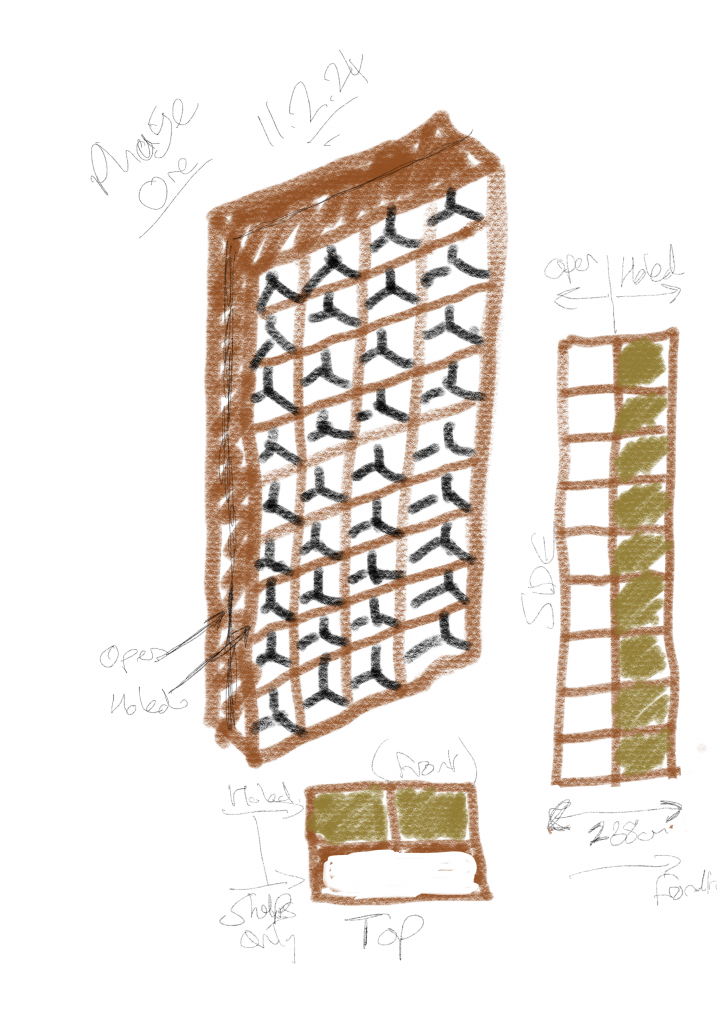
I wanted to create a fresh looking space, for the boots to sit in. I decided on pidgeon holes, early on, but much of it has changed. Upon inspection of the space, I realised that the back corners had edging placed there. It just so happened that the two layers would fit neatly in front of this. I then changed it so that it would be made up of two layers. The rear one would be horizontal shelving, only. With the 25mm gap down the back, due to the edging, it would allow light to go behind the boots, helping everybody to see them, clearly. The front layer would have the squares that make up the pidgeon holes. Each pair would be separated in their twenty-four plots. As the original space housed seventy six pairs, I needed to also use the first bay on the wall to the side. (More on that, soon.)
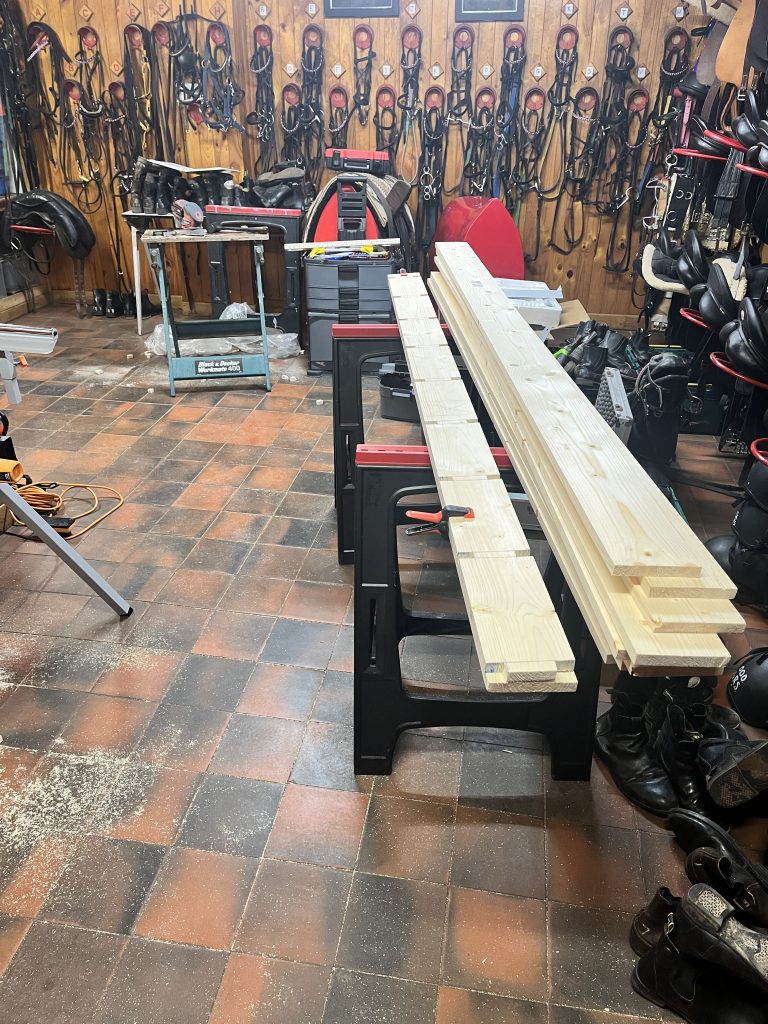
The materials used is all soft wood pine. I chose this as varnish will take well and there was no need for hard woods as they would only be housing, small to medium, riding boots.
Cutting and Setup
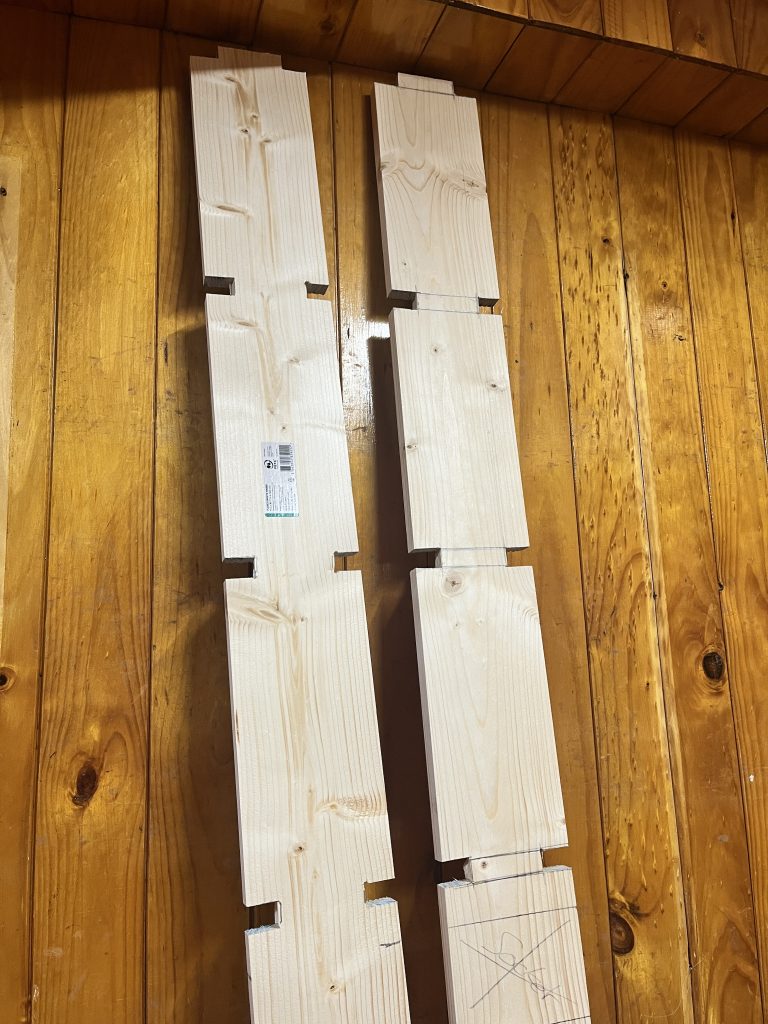
I then took the next three hours, just cutting and trimming the rear layer. For this, I used the slide-saw and hacksaw. I realised quickly that I needed to adapt for the next session, as this was too time-consuming. Roughly cut, I began fitting them together. This proved to be a nuiscance, and so I tried another tack. Doing some trimming and positioning, I managerd to fit them in place.
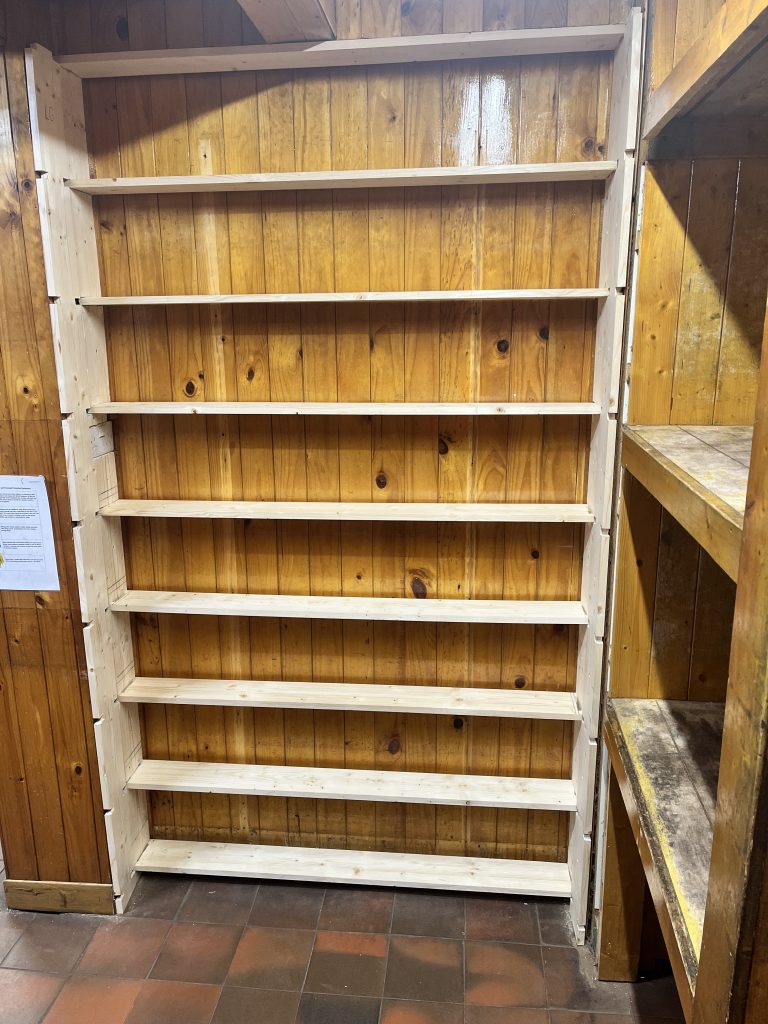
Fastening and Stopping
The fixing was simple. There is already a cladding on the wall, so with the shelves in place and a few well placed screws, they would not move. In the first seven hours I managed to get the rear layer in with rough edging and a need for some filling. The sides of the front layer have also been attached so that they are ready for me to complete the build. This is only one of many sessions that are going to be needed, as the whole room is to be done. I will look at a basic post that explains each phase in the near future, but to say it is barely scratched, is an understatement.